
This guide shows how to connect to FTP, SFTP, FTPS, S3 and WebDAV on macOS using FQB Transfer, a WinSCP-style FTP client for Mac. If you’ve used WinSCP on Windows, the workflow will feel familiar: create a saved session, connect, and transfer files using drag & drop. The tutorial below explains each step clearly, from choosing the right protocol to connecting with a single click.
Menu
Quick Start Checklist
Before you connect, gather the same essentials you’d use in any FTP/SFTP client.
- Protocol: FTP, FTPS, SFTP, SCP, Amazon S3, or WebDAV.
- Host / IP (for FTP/SFTP/FTPS/SCP) or endpoint (for S3/WebDAV).
- Port: common defaults are FTP 21, SFTP 22 (your provider may use a custom port).
- Credentials: username + password, or keys (e.g., S3 Access Key / Secret Key).
- Session name: a label you’ll recognize later (example: “Client A – Prod”).
Getting started: Create your first connection (Wizard)
On first launch, FQB-Transfer can guide you through a quick 3-step connection setup. You can edit everything later, so don’t overthink it.
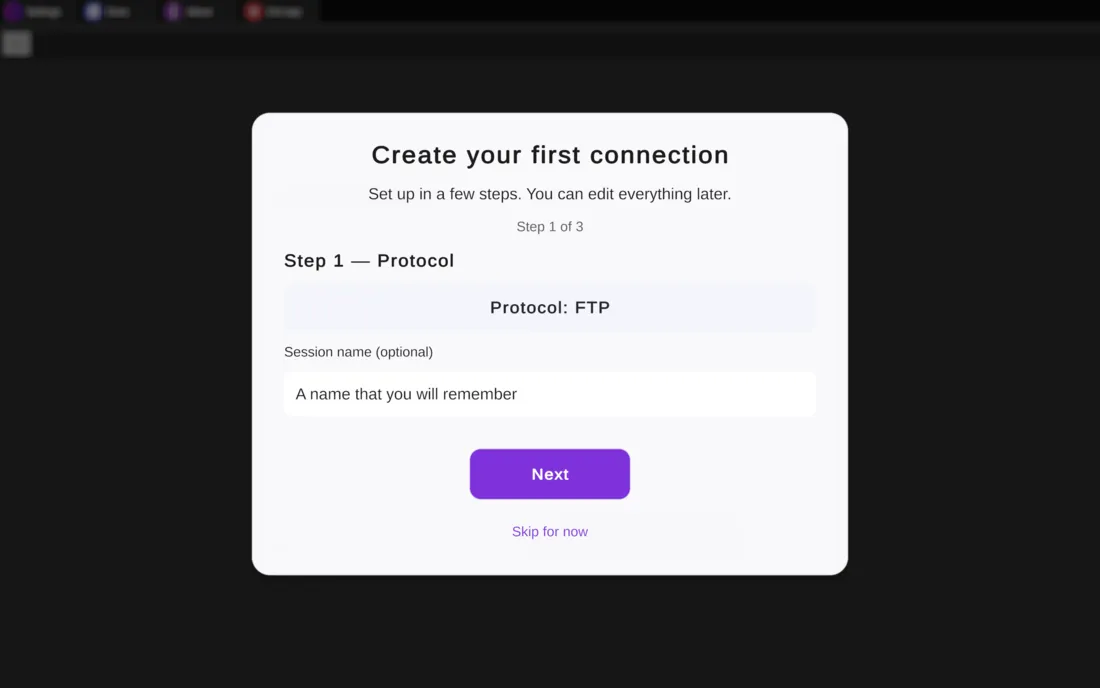
Step 1 — Protocol
Choose how you want to connect. If you’re not sure, use these rules:
- SFTP (recommended): best default for most Linux hosting and VPS setups.
- FTPS: when your provider specifically offers “FTP over TLS”.
- FTP: only if you have no secure option (not recommended for real credentials).
- Amazon S3: for S3-compatible storage using Access Keys (not a traditional “server login”).
- WebDAV: for WebDAV servers (often used for file shares and some cloud services).
Add an optional Session name now (or keep it blank and name it later). Then click Next.
Step 2 — Server
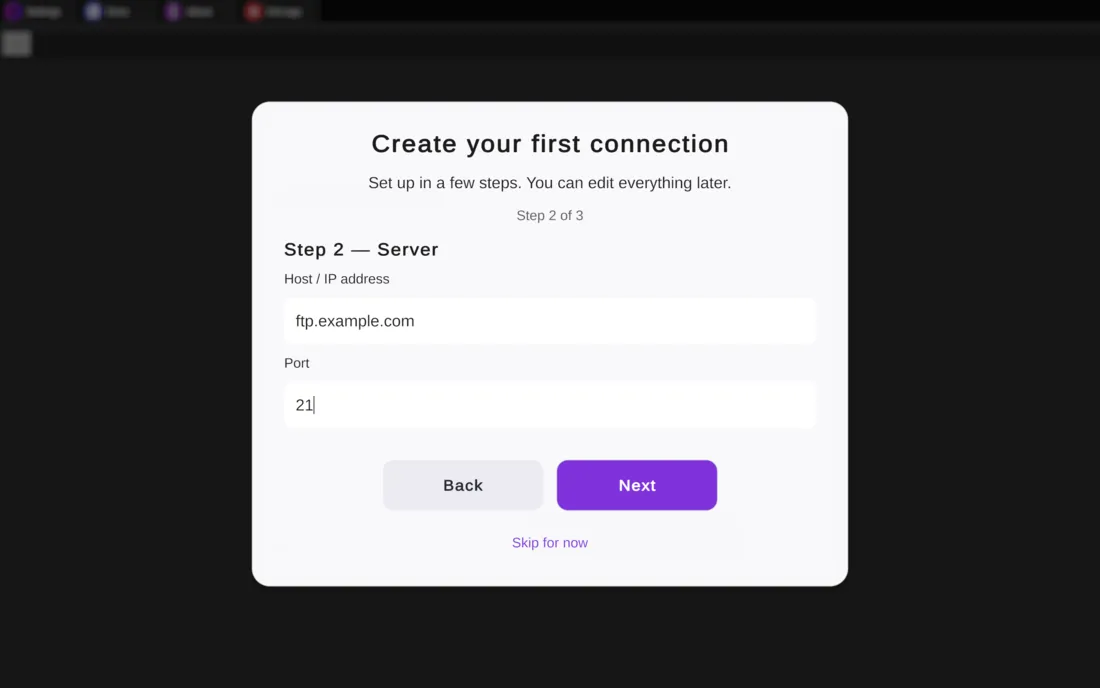
Enter your Host / IP address and Port. In most cases, the default port is correct:
- FTP: 21
- SFTP: 22
- FTPS: provider-dependent (ask your host if you’re unsure)
Click Next to continue.
Step 3 — Login
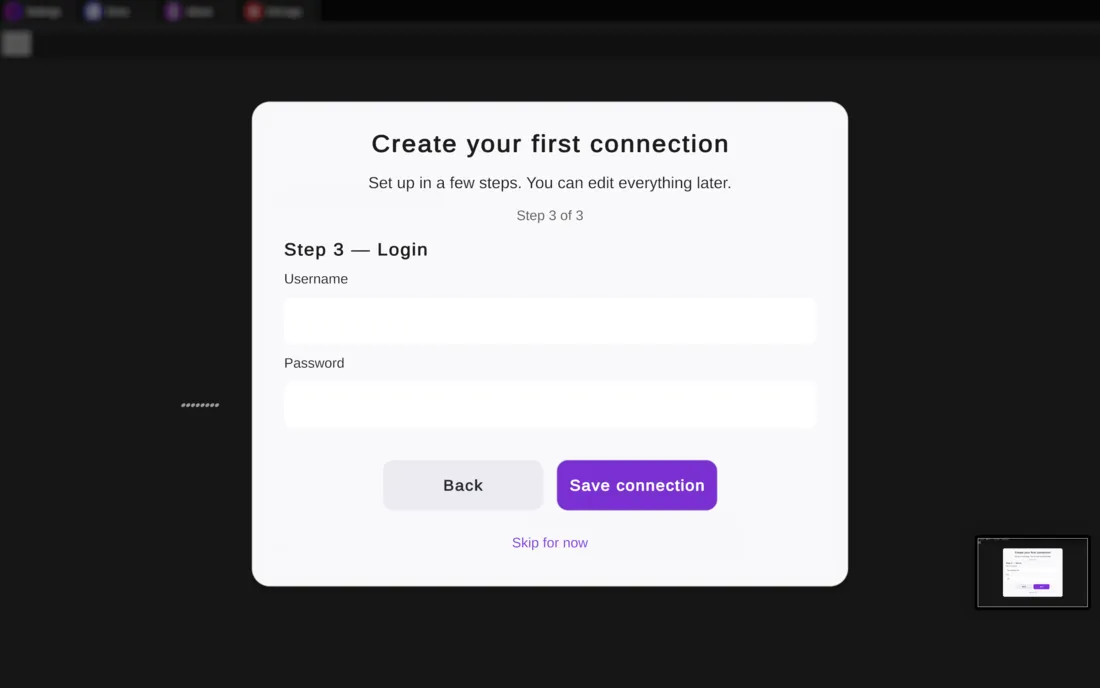
Enter your Username and Password. Then click Save connection. If you don’t want to store credentials on this Mac, you can use Skip for now and type them when connecting.
After saving, you’ll be able to connect instantly from your saved sessions list.
Saved Sessions screen: Connect in one click
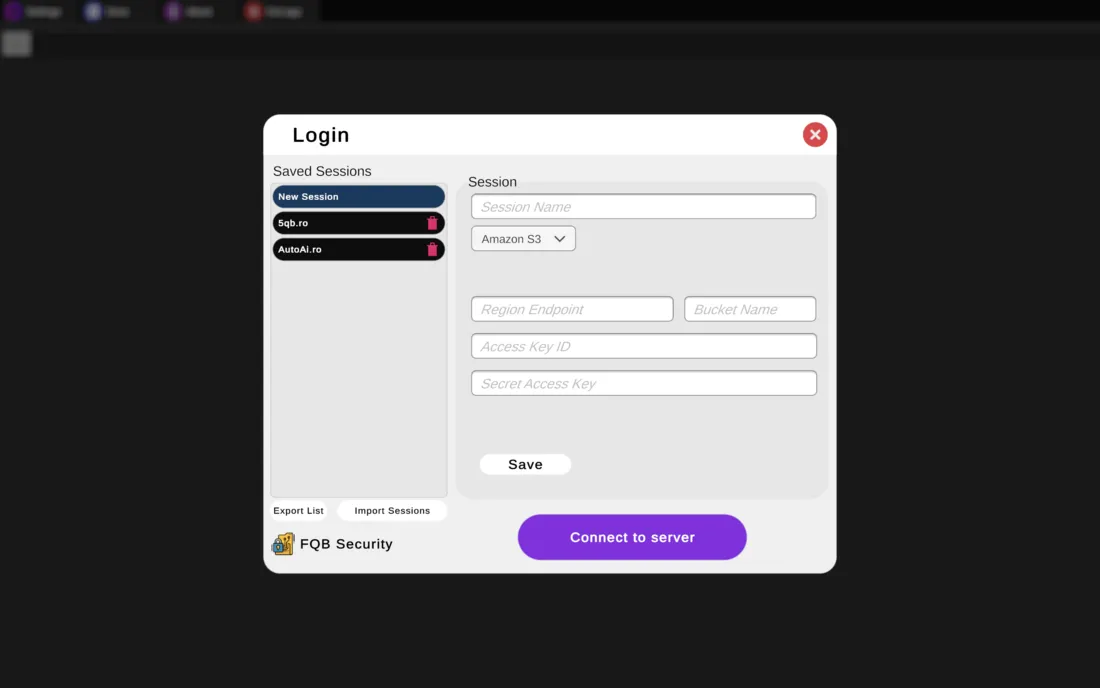
Once you’ve created a session, it appears under Saved Sessions. This is your “WinSCP sessions list” equivalent—pick a saved session and connect quickly.
Create or edit a session
- Click New Session to create a fresh profile.
- Select an existing session to edit its details (name, protocol, credentials, etc.).
- Use clear naming: “Client – Prod”, “Client – Staging”, “My VPS – Backup”.
Protocol-specific fields you’ll see
The form adapts to the selected protocol. Examples:
- FTP / SFTP / FTPS / SCP: Host, Port, Username, Password (or key-based auth where supported).
- Amazon S3: Region/Endpoint, Bucket Name, Access Key ID, Secret Access Key.
- WebDAV: Server URL/endpoint + credentials depending on your server configuration.
Click Save to store changes, then use Connect to server to start your session.
Import & Export sessions
If you manage multiple machines or team setups, you can use:
- Export List to back up or share your saved sessions.
- Import Sessions to restore sessions on a new Mac.
Common setup examples
Example 1: Typical hosting (SFTP)
- Protocol: SFTP
- Host: yourdomain.com (or server IP)
- Port: 22
- Username/Password: provided by your host
Example 2: Classic FTP server (FTP)
- Protocol: FTP
- Host: ftp.yourdomain.com
- Port: 21
- Credentials: FTP username + password
Note: FTP is not encrypted. Prefer SFTP/FTPS whenever possible.
Example 3: Amazon S3 storage
- Protocol: Amazon S3
- Region/Endpoint: your S3 region or S3-compatible endpoint
- Bucket Name: your bucket
- Access Key ID / Secret Access Key: from AWS IAM (or your S3 provider)
Key Takeaways
- Use the 3-step wizard: Protocol → Server → Login, then save the connection.
- Prefer SFTP (or FTPS) over plain FTP for real accounts and production servers.
- Keep sessions organized with clear names (Prod/Staging/Client) to avoid mistakes.
- Use Export/Import to back up sessions or move them to another Mac.